


Craft Wrapping Paper, Ink, and a Sprinkle of Creativity
The holiday season is here, and what better way to add a personal touch to your festive decor than with a handmade table runner? If you’re all about (easy) homemade holiday decor, this fun DIY project will spruce up your holiday table and add a unique, handmade charm to your holiday dinners.
Materials You’ll Need:
- Craft Wrapping Paper: Craft wrapping paper is a versatile canvas for any occasion, especially for the holidays!
- India Ink or Craft Paint: Rich, black India ink is the star of the project. It provides a bold contrast against the wrapping paper and allows for a little drippy, splattering, casual style (which is my favorite look!). Craft paint in a variety of holiday colors to match your decor is also a great option!
- Paintbrushes: Try a variety of paintbrushes for different stroke sizes and textures. This will give you the flexibility to create many patterns and designs on your table runner.
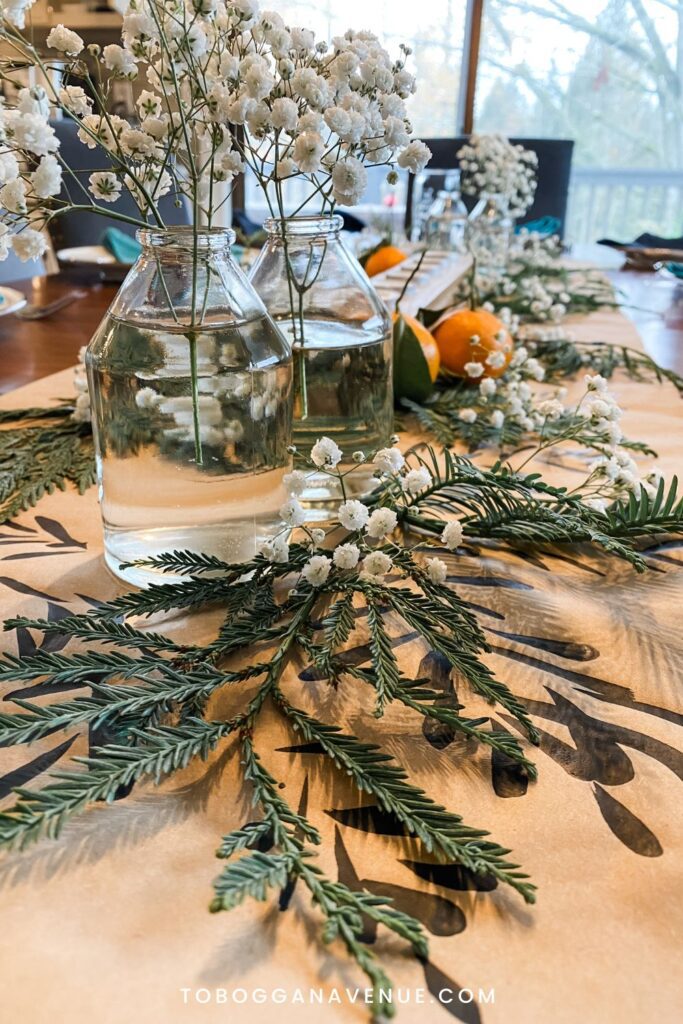
- Bonus: Fresh evergreens, oranges, candles and cut flowers.
Let’s Get Started:
Step 1: Unroll and Cut
Begin by unrolling the craft wrapping paper to your desired length for the table runner. Consider the dimensions of your dining table, leaving some excess on each end for a place setting, or let it drape over the ends for more drama. Once you’ve decided on the size, carefully cut the paper using scissors or a craft knife. Scalloped or other shaped scissors would also be a fun touch!
Unroll your paper and place weights on the corners if needed to prevent it from rolling up on you as you work (use something that you don’t mind getting a little paint on in case of accidental splattering).
Step 2: Plan Your Design
Before diving in, it’s a good idea to take a moment to plan your design. Whether it’s festive winter motifs, abstract patterns, or a combination of both, sketch out your ideas on a scrap piece of paper. You can also sketch lightly with pencil on the runner as the ink will cover any light marks made. This will serve as your guide and help you visualize the final layout. It’s also helpful to arrange any candle holders or vases you plan to use to be sure you won’t cover the important parts of your painted design.
If you’re feeling inspired (or short on time) go ahead and skip this step and make it up as you go!
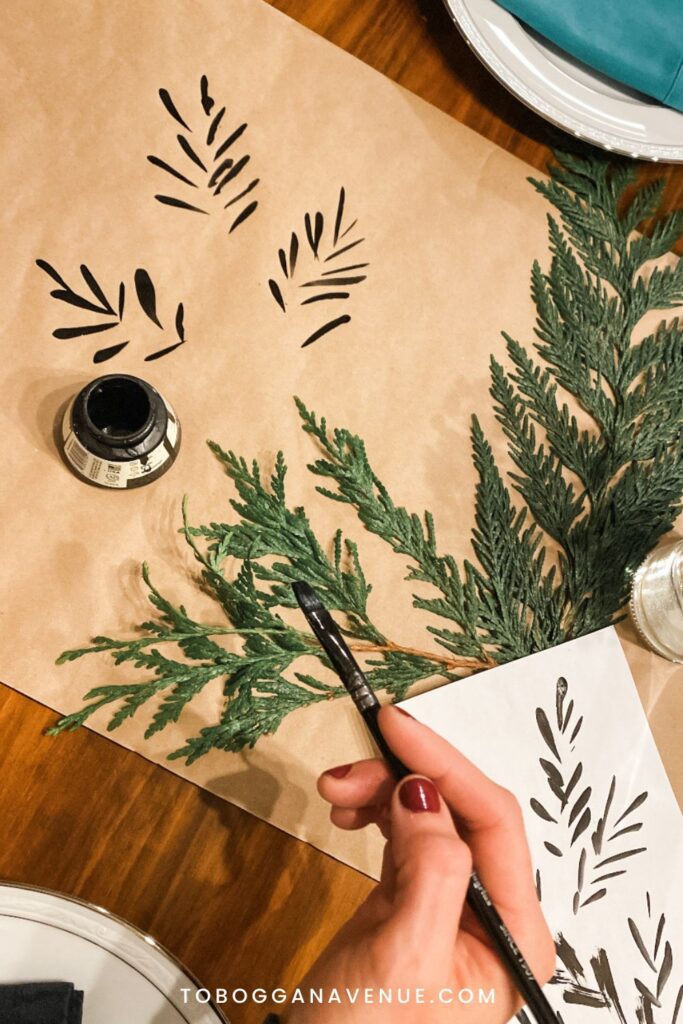
Step 3: Dip and Paint
Now, the real fun begins! Pour a small amount of India ink or craft paint into a container. Dip your paintbrush into the ink and start applying your design to the craft wrapping paper. Experiment with strokes, drips, lines, and shapes to create a festive pattern. Don’t be afraid to let your creativity (and the ink) flow! I find it helpful to paint a few motifs on a scrap of paper first as it can take a few tries before my hand and my brain work together to create the designs I want. Feel free to leave a few splatters and drips if that’s your style! (Just make sure you cover any surrounding surfaces as paint can travel more than you might realize! (Ask me how I know…)
Step 4: Layer and Repeat
As the ink dries, consider layering different patterns to add depth and complexity to your table runner. Mix up your brushstrokes and experiment with negative space to keep things interesting. The beauty of this DIY project lies in its imperfections and your ability to match it exactly to your decor style and color. Also, try adding other colors – acrylic and craft paints are perfect for the task!
Step 5: Let It Dry
Allow your table runner to dry completely before placing it on your holiday table. This ensures that the ink dries fully and won’t smudge during the next step – styling!
Step 6: Decorate and Embellish
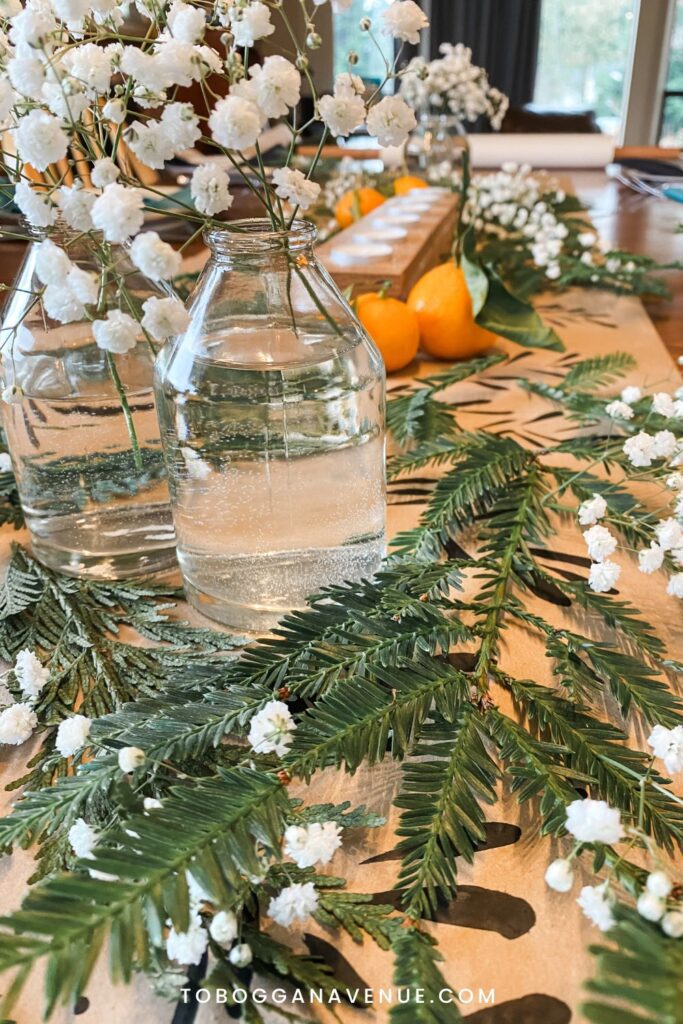
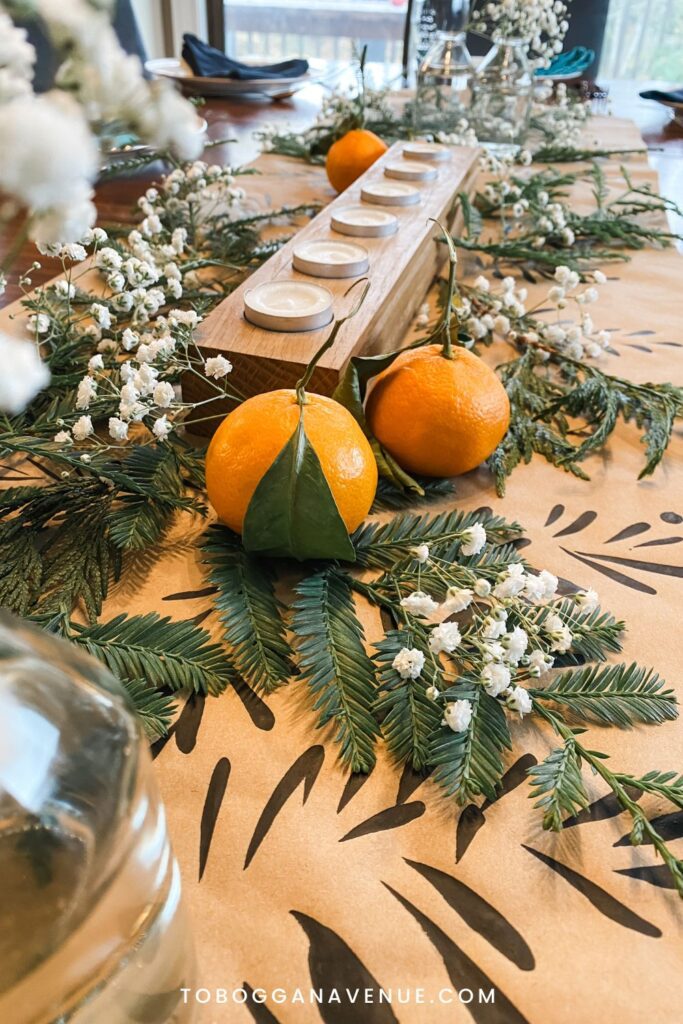
Now for the fun part! Decorating and embellishing! You certainly can add your runner to the table alone, but I love to dress it up with a few fresh-cut evergreens from the yard, small oranges (with leaves still on!), and candles (battery-operated are a good option next to the fresh evergreens). You can also add fresh-cut flowers, and if you do this, I love placing small bouquets in bud vases along the runner so guests can still see each other and have conversations without being blocked by a large floral arrangement.
You did it! Your DIY Table Runner!
Congratulations on creating your very own DIY holiday table runner! Your craft wrapping paper, India ink, and paintbrushes have come together to transform simple materials into a work of art, to be kept from year to year (or recycled after the holiday season). Cheers to festive gatherings filled with warmth, joy, and a touch of your unique DIY magic! If you need more updates for your holiday kitchen, check out the towels in this post!
*This post does contain affiliate links to products I use and love.


")


Read the Comments +