


‘Tis the season to get crafty and cozy!
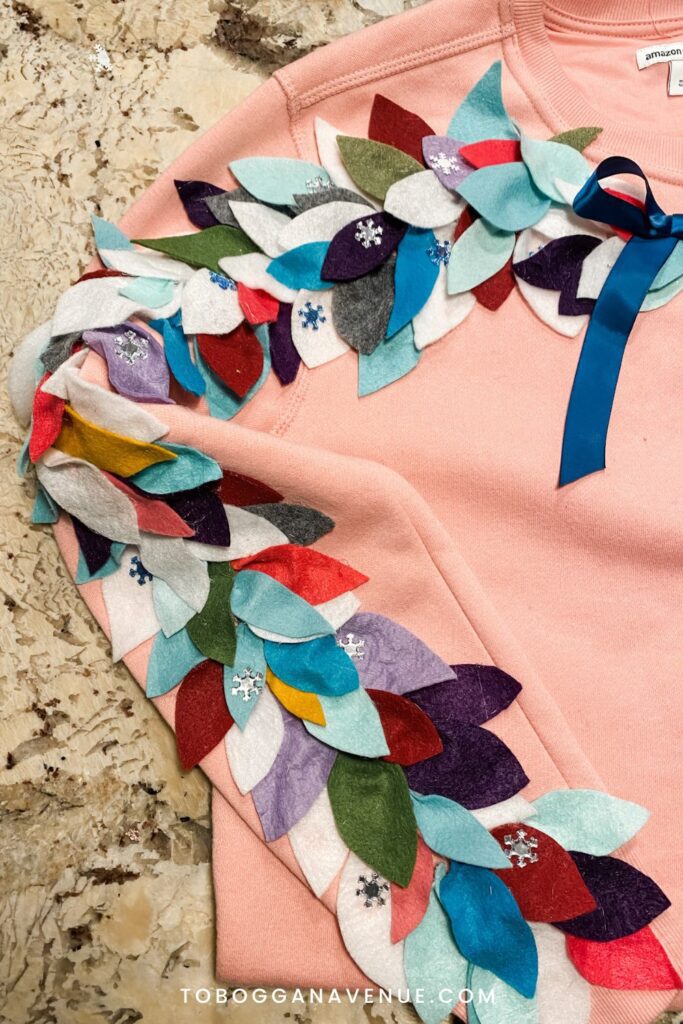
Can’t find the perfect Christmas sweater in the store? Or, are you in need of a last-minute cute/ugly Christmas sweater/sweatshirt for a holiday party? Here’s a DIY project for you! We’ll turn a simple sweatshirt into a wearable holiday wreath using colorful felt leaves and a touch of hot glue magic. Add a little holiday spirit to your wardrobe and stand out at every festive occasion!
Materials You’ll Need:
- Sweatshirt: Choose a plain sweatshirt in a color that complements your holiday style. Whether it’s classic red or green, a festive pink or a winter white, the choice is yours. I picked up this one from Amazon for my project.
- Felt Sheets: Choose a variety of felt colors to mimic the shades of winter foliage for a traditional look. Think deep greens, rich reds, and even a touch of gold for a festive twist. Or do what I did and choose an array of bright, coordinating colors for an eclectic look.
- Scissors: A good pair of fabric scissors will be your best friend as you cut out the felt leaves in various shapes and sizes. (Get ready for a lot of cutting, so maybe it’s time to put on your favorite holiday movie and get to work!)
- Hot Glue Gun: To securely attach the felt leaves to your sweatshirt.
- Extra Embellishments: I used sparkly snowflakes and a ribbon to add a little festive flair!
- Marker or Chalk: For sketching out your wreath design on the sleeves before attaching the felt leaves.

Let’s Get Started:
Step 1: Plan Your Wreath Design
Before diving into the felt-cutting frenzy, plan the layout of your wreath on the sleeves. Use chalk to lightly sketch the circular shape of the wreath, making sure it’s centered and will create a circle when your hands are folded. I like chalk because it can be easily brushed off and re-created if needed.

Step 2: Cut Out Felt Leaves
Now, grab those felt sheets and start cutting out leaves in various shapes and sizes. Feel free to experiment with different leaf designs, from classic holly to whimsical shapes. The more colors and textures, the merrier, I say! But you could also opt for a more traditional look with red and green. Or go for a classic, neutral snowy white!

Step 3: Arrange and Rearrange
Once you have a nice pile of leaves cut out and while your glue gun is heating up, play around with the arrangement of the felt leaves on your sweatshirt sleeves. This step allows you to play with the design and be sure you’re happy with the overall look of your wreath (and decide if you have enough leaves cut).

Step 4: Glue It On
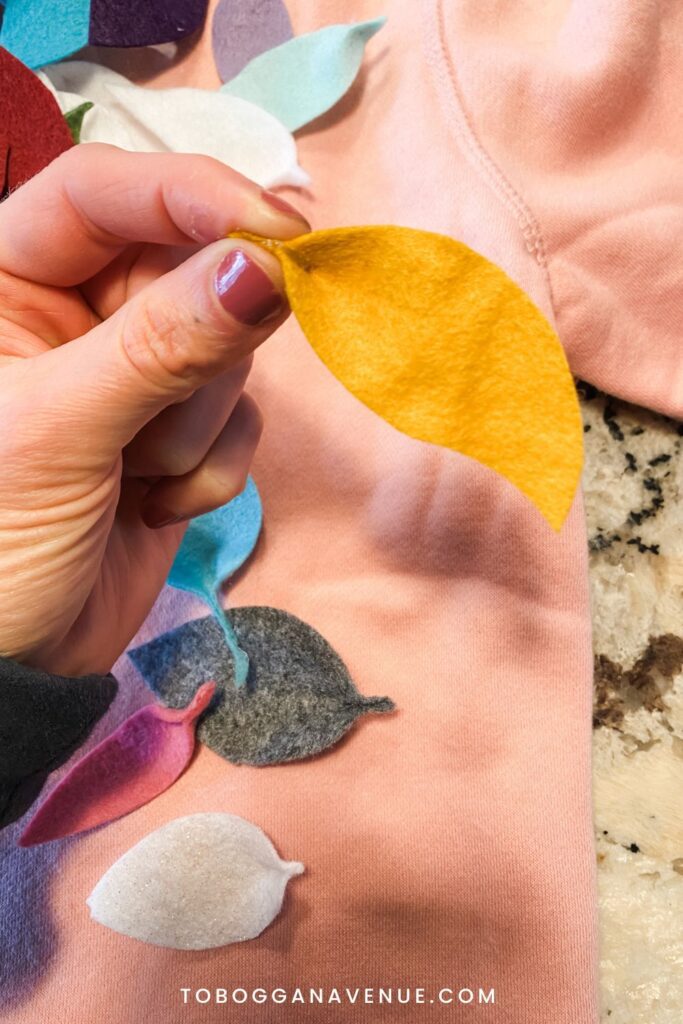
Once you’ve settled on the perfect arrangement, it’s time for the hot glue. To give the leaves a little more dimension, I like to add a small bead of glue to one end and pinch it together until cooled. (See next two images).

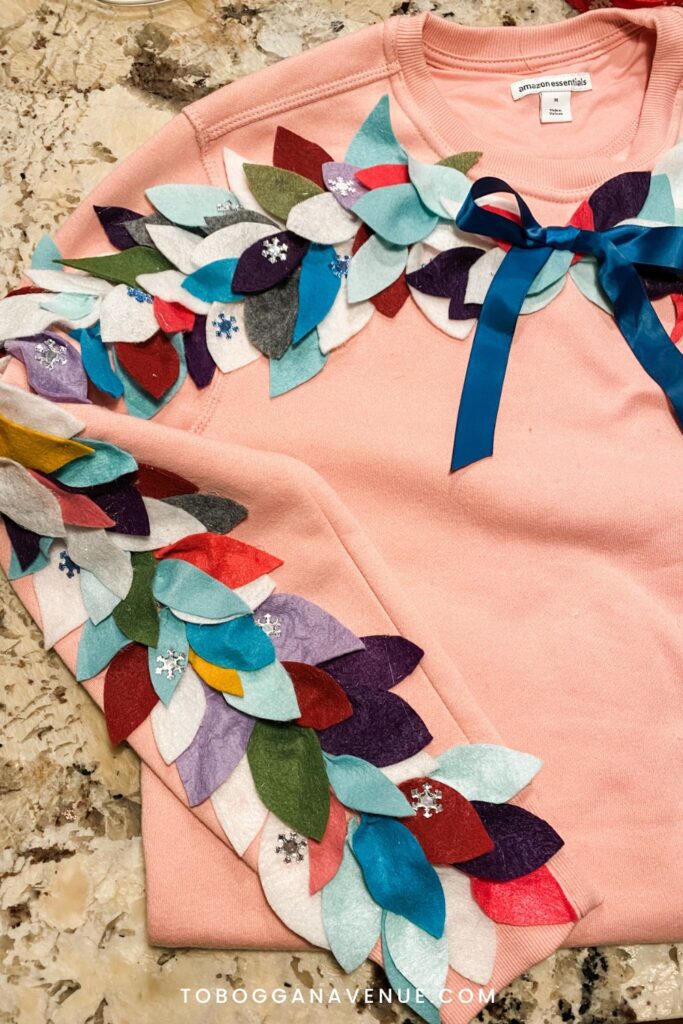
Once you’ve added dimension to each leaf, start adding them to the sweatshirt. Working in small sections, carefully apply hot glue to the back of each felt leaf and press it onto the sweatshirt sleeve. Continue this process until the entire wreath is filled with your handmade foliage. If you find a few sparse areas, cut extra leaves and add them in place.

Step 5: Finishing Touches
Inspect your wreath and make any necessary adjustments. This is a great time to try on the sweatshirt and see how the leaves of the wreath hang when worn. Reinforce any loose leaves with extra glue. At this point, you can add a bow to the top and some festive embellishments to complete your wreath with a flourish!

Step 6: Show it Off!
Now that your DIY Christmas sweatshirt is complete, it’s time to show it off! Wear it proudly to holiday gatherings, virtual celebrations, or while sipping cocoa by the fire. Your unique creation is sure to spread joy and capture the spirit of the season.
There you have it—a festive and cozy DIY Christmas sweatshirt that’s as unique as you are! This project is not only fun and festive but also a wonderful way to add a personal touch to your seasonal wardrobe. Happy Holiday crafting! If you do create your own and want to share it, send me a photo at jennie@tobogganavenue.com or tag me on Instagram at @toboggan_avenue – I’d love to see what you create! For more holiday craft ideas, check out this holiday table runner post!


")


Read the Comments +